With the cost of meat going up lately, I’ve been looking for more ways to make cheaper cuts of meat work better for me. That means, recently, that I’ve been buying whole chickens. One of my current favorite uses of chicken breasts has always been chicken teriyaki. This sweet and savory Asian favorite is perfect to make ahead of time when you’re doing some meal prep, and the time it takes to make the sauce from scratch is well, well worth the results.
In this piece, I’ll go over the tools and ingredients you’ll need, before getting right to my method and some serving suggestions.

Tools
To make my version of chicken teriyaki, you’ll need:
- A wok
- A small mixing bowl
- One large storage bowl
- A fork or whisk
- A plastic or metal slotted spoon
- A sharp chef’s knife
Ingredients
And the ingredients are as follows:
- Two large chicken breasts
- Canola oil for frying
- 1/4 cup soy sauce
- 1/4 cup water
- 1 tablespoon cornstarch
- 1 tablespoon sesame oil
- 1 tablespoon rice vinegar
- 1/4 cup brown sugar
- 1 tablespoon honey
- 1/2 tablespoon ground ginger
- 2 cloves minced garlic
Method
Generally, I try to cook efficiently as possible with safety and cleanliness in mind. That said, I recommend wearing a long sleeve shirt while you do this. I also have some tactical gloves that are heat and cut-resistant. Those, as well as some rubber gloves, are kit that makes sense to me here.
It’s wise, cleaning wise, to deal with anything that can be eaten raw first, then move on to things that need to be cooked. So, for this, we’re tackling the sauce, then the chicken.
I, for one, abhor those recipes that give an irrelevant life story before getting to it, so, here, let’s keep it to the point. I like chicken teriyaki, you like chicken teriyaki: let’s get cooking.
The sauce is super simple: first, mince the garlic with your chef’s knife. Then, put everything on that ingredients list but the chicken and the canola oil into your small mixing bowl, and whisk until everything is combined. You’ll likely have to re-whisk it once it’s time to put it in the chicken, so keep the whisky handy.
Next, cut the chicken into bite-sized cubes: I prefer .5″x.5″ to keep the cooking process nice and short. Put the wok on the stove and pour about .5″ of oil into the bottom, and turn up the heat to about 8/10, or, in the case of my stove, an oil temperature of 350 degrees ferenheit. You’ll know that the oil is ready once it starts to shimmer. To check it, you can use your slotted spoon to place one piece in. There should be oil deep enough to cover the chicken completely, and it should be hot enough to sizzle. Once you can get a piece to sizzle immediately, the gloves go on and it’s time to start frying.
In batches that do not crowd, fry each piece of chicken until the outside begins to turn brown slightly. Upon browning, remove the batch and put it in the large storage bowl, adding the next batch as soon as you can. Repeat until all of the chicken is fried. Now. Dump the oil into a safe receptacle.
With the wok still hot, add the chicken back in, stirring until the chicken is hot. Now, re-whisk your sauce, pour over the chicken in the wok, and stir vigorously. In about thirty seconds, the sauce should thicken into a glaze: keep stirring for another thirty seconds until the chicken is evenly coated.
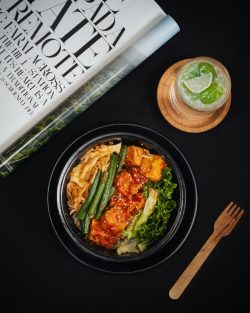
Serve on rice with a side of steamed broccoli.